Maui Girl Cooks

“One of the very nicest things about life is the way we must regularly stop whatever it is we are doing and devote our attention to eating.” Luciano Pavarotti


2 Comments

Roasted Okra & Garlic

My husband has never been a fan of okra, and has made many jokes about its sliminess, a property which makes it a valuable ingredient to help thicken soups & stews like jambalaya.  However, he does enjoy the roasted okra I’ve been making, so now I have to share what used to be all mine.  It isn’t the least bit objectionable, if you know what I mean.  We have it as a pupu {appetizer} whenever it’s available from the farmers’ market, which is now.  It’s a simple recipe that can be ready to eat in about 30″.

When selecting okra, be sure to get small pods.  If the pods are too large, they can be woody & stringy…not at all pleasant to eat.

This is a “no-recipe recipe,” meaning you can eyeball all of the ingredients.

Okra ready to roast


Roasted Okra

Roasted Okra & Garlic

Okra, washed & dried
Garlic, large cloves cut into thirds, smaller cloves cut in half
Extra virgin olive oil
Freshly ground salt & pepper
Fresh lemon juice, if desired {good addition!}

Preheat oven to 400 degrees {375 is fine too if you already have the oven going for something else}.  Make sure you have an oven rack on the lowest level before it gets hot.  Line a sheet pan with parchment or foil.  Wash & dry okra.  Put okra & garlic on the sheet pan.  Drizzle with olive oil & grind a good amount of salt & pepper.  Toss to coat.  You want the okra to be coated with the oil, but not too much…greasy vegetables are never good.  Make sure okra is in a single layer & put on the bottom rack.   After 10″ or so, give the okra a toss & continue roasting until the pods & garlic are tender & brown.  Taste a bit of garlic to make sure it doesn’t taste raw.  Squeeze a bit of fresh lemon juice over all if you like, & enjoy!

How do you like to eat okra?  Leave a comment & let us know!

Bon appetit!


9 Comments

Savory Yogurt

My husband and I are not vegetarians, but we eat a plant based diet most of the time. We enjoy food of all kinds, preferring food that is good for us, but happy to indulge in delicious food that may not be particularly healthy, on occasion.  Our philosophy is that it’s what we do most of the time that really matters.

My dad was in the Air Force, and did a tour of duty in Korea for a year when I was in the fourth grade, so my mom and I moved to Harrisonburg, Virginia, in the beautiful Shenandoah Valley. My family is from Harrisonburg, so we moved from San Antonio, Texas to be closer to family. Those Virginia kids told me I “talked funny.” What!? I don’t recall, but I probably thought they “talked funny” too. But I digress. For some reason, that was the year I decided to dabble in “vegetarianism,”  in quotation marks because I didn’t know the meaning of the word at the tender young age of 9.  I don’t know where I got the idea that mom and I should be vegetarians, because I’m pretty sure there weren’t many of them in the Valley at that time.

As adults, the beginning of my exploration into vegetarian food lies with a friend I worked with at Stanford Medical Center, where I worked on the oncology floor before returning to school full time for my teaching degree.  Actually, I went back to get a degree in nutrition, but changed my mind and became a teacher. I’m sure I would have been happy in either field, but I have no regrets with the path I took. Erika was a vegetarian, and she introduced me to one of my favorite cookbooks, Laurel’s Kitchen.

We have been eating plain yogurt for a long time at our house. It started when I learned about falafel, from Erika and Laurel’s Kitchen. I can’t remember if my first falafel was from a local restaurant that served fried falafel balls, or the baked falafel I made from Laurel’s Kitchen, but they were both delicious. I’ll post a falafel recipe in the future, but for now, I’d like to say how delicious plain yogurt is, and how it can be the main focus or a tasty garnish. It’s probably safe to say that it is an acquired taste, and in my opinion, one worth acquiring.  Here are a few favorite ways I like to eat plain yogurt.  They are all seasoned with freshly ground salt, freshly ground black pepper and extra virgin olive oil-fresh herbs are always a welcome addition.

Try this for breakfast or lunch…you can make it however you like.


This slideshow requires JavaScript.

Or this. . . Can you tell the orange bowl is my favorite??

yogurt with preserved lemons, tomatoes, kalamata olives and sprouts

Yogurt, tomatoes, preserved lemons, kalamata olives and sprouts

How about this one?  Today’s lunch. . .

Yogurt, herring, diced beets, capers and sprouts

Yogurt, pickled herring, steamed beets, rinsed capers & sprouts

Yogurt Bowl with Cilantro Blossoms

Yogurt with Avocado, Baby Lettuce, Cilantro Blossoms, Olive Oil & a Splash of Red Wine Vinegar

What will you put on your plain yogurt?  I hope I’ve given you some ideas!


2 Comments

Thinking About Food…Outside the Box

Two weeks ago, I ordered what I’m sure will be in my top 5 “go to” books about food.  My first introduction to its author, Samin Nosrat, was on Food52 last month.  The name of her book?  Salt, Fat, Acid, Heat:  Mastering the Elements of Good Cooking.  Her basic premise is that you can cook almost anything without a recipe, if you understand the four elements- salt, fat, acid and heat.  I love Food52, and their recent {April 2017} series called “Samin Nosrat’s 12 Must-Know Lessons That’ve Changed How We Cook” has me excited about thinking about food in a whole new way.   I highly recommend you click the link and check it out.  It will give you a different perspective on how to cook, season and enjoy food.  There are lessons, including videos, for each element.  Let’s take salt for example-when you taste food for seasoning, you may find it to be bland.  Many of us reach for salt as the cure for food that is flat.  Nope, not so fast, according to Nosrat.  Step away from the salt and think about the many ingredients that can add more saltiness and flavor to food…Parmesan, anchovies, olives, kimchi, capers, fish sauce, shoyu, raw sauerkraut, preserved lemons and more.  Before you toss in some sodium chloride in its crystalline form, take a moment to consider some other flavorful options; you will be glad you did!

A new food discovery for me, which contributes both salt and acid to a dish, is preserved lemons.  I first tasted them in California earlier this year, when I visited my aunt, who has a Meyer lemon tree in her front yard.

Debbie's Meyer Lemon Tree

Southern California Meyer Lemon Tree

She has a freezer full of frozen lemon juice {as do I}, and sought out other recipes for using up the many gorgeous lemons begging to be enjoyed in ways more interesting than juice.  She found a recipe for preserved lemons, and had some ready to eat when I was visiting;  I fell in love with them!  Breakfast was sangak {Iranian flatbread} topped with with homemade hummus, cooked spinach and diced pieces of preserved lemon.  Many, if not most, recipes for preserved lemons say to discard the pulp and eat only the rind;  after a quick rinse, I eat the whole lemon, including the viscous tart/salty liquid, all of which get better and better with time.

Sangak with Hummus and Preserved Lemon

Sangak with Hummus, Preserved Lemon, Olive Oil, Sesame Seeds & Sumac

Delicious! Preserved lemons are similar to capers, but I think they are better, and quite addictive.  What prevents me from inhaling my preserved lemons is that I only made 3 pints, so I am rationing them out until my sources of local Meyer lemons have more ripe lemons.  The next time I get my hands on another bag of lemons, I will then make many pints of these delectable lemons, and eat them with abandon…I highly recommend that you do too!  I made the recipe exactly as written on the Daring Gourmet blog, but next time I may slice the lemons instead of quartering them, to fit more into the jars.

Once your preserved lemons are ready to eat, enjoy them with hummus {this is my former recipe, which is excellent, but here is my new favorite Israeli hummus recipe}, fish, chicken, salad dressings, salads & more.  Use your imagination & enjoy your jars of sunny deliciousness!

Preserved Lemons in Jar

Preserved Lemons in Jar


Leave a comment

You may be interested in these…

Recipes

Fried Greens Meatlessballs {Food52.com}

~ We rarely have a problem using up our greens, and we buy a lot of them every week at the farmers market.  This recipe looks like something right up my alley.

greenmeatlessballs


Basil Buttermilk Ranch Dressing {Food52.com}

~ I’ve never been a fan of Ranch Dressing, but I found this recipe when looking for ideas for using up the buttermilk.  Think I’ll try it!

Buttermilk Ranch Dressing


Pea Butter {Epicurious.com}

~ I love peas & I love butter…this is a no brainer my friends!  Use this spring time butter on  lots of things, from toast to pasta.

Spring Pea Butter


Okonomiyaki {Smitten Kitchen}

~ I can’t wait to try this version of okonomiyaki, which I’ve never eaten, but sure want to.

Smitten Kitchen Okonomiyaki


Chocolate Buckwheat Cake {Smitten Kitchen}

~ I’ve been thinking about buckwheat cakes lately.  Haven’t you?

Chocolate Buckwheat Cake

Articles 

The Changing American Diet {Flowingdata.com}

~ This is a fascinating graphic that illustrates what Americans eat on a daily basis over several decades {1970-2013}.  Potatoes have been our #1 vegetable since 1970.

Changing American Diet Graphic

New FDA Food Label

~ We have a new food label that clearly shows calories & added sugars.  Hurray!

new FDA food label


Cooking with Kids {Sprouted Kitchen}

~ Here are some tips for cooking with children & a few tasty recipes too.

Cooking+with+my+Nieces+.+Sprouted+Kitchen

Top 30 Maui Restaurants {Pride of Maui}

~ Coming to Maui?  Here’s a rundown of 30 top Maui restaurants.  Check it out!

top-30-restaurants_featured

Video

David Leibovitz at the Jean-Charles Rouchoux Chocolate Shop in Paris

~ French chocolates anyone?  Oui, s’il vous plait!

jean-charles-rochoux-and-denise-acabo-paris-chocolate-shop-200x300

Bon appetit!


Leave a comment

Fresh from the Farmers Market

My husband came home with some fabulous goodies from the Upcountry Maui Farmers Market yesterday.  Of course, this week was no different than any other, because he always comes home with great stuff…year round.  When you have a vibrant market that is overflowing with beautiful, top quality local food, you can’t go wrong…unless you get there late, and miss out on the best stuff.  Which is why my husband goes.  At this time of the year, he is at the market by 6:20 am, because things get going early in Maui.

Spring Mix 2

This pretty salad mix is a delightful blend of all kinds of greens, from bitter to sweet.  I cannot tell you what’s in it, beyond mizuna, romaine, baby kale and some lovely nasturtium blossoms.  It’s delicious on its own, or as part of a “regular” lettuce salad.  The little beet greens you see in the picture came from a big bunch of beets that had their greens attached.  I’ve been separating out the small tender beet greens and putting them into the lettuce bag for salads…delicious.  Which brings me to some “regular” lettuce that is absolutely gorgeous & crisp.  After I wash lettuce, it’s a great treat to eat a bowl of it, with a grind of salt, freshly ground pepper, a drizzle of good olive oil & sometimes a splash of red wine vinegar.  Freshly picked lettuce is wonderful and doesn’t need much adornment.

Red leaf lettuce

We are fortunate to have many varieties of avocado trees in Maui.  I have no idea what variety these are, but I can’t wait to cut one open.  The apple bananas are also from the market and are one of many varieties of bananas grown here in the islands.

Bananas & avocados

Papayas are in now and they are delicious!  I would say that papayas are an acquired taste, and if you aren’t quite there yet, try one with a splash of lime juice.  That’s how I came to enjoy this tropical fruit.

Last, but certainly not least, are these eggplants.  I have finally come around to enjoying  something other than the Italian Globe eggplant.  Yes, I have embraced the long, slender eggplant.  I’ve been making eggplant broiled with a mixture of extra virgin olive oil and pomegranate molasses {a new favorite ingredient, along with the labneh that tops the eggplant}.  Find the recipe here.  I’ve written about another favorite way to serve eggplant here.   I haven’t had any pomegranate arils for the garnish for this dish, so I’ve been using fresh cilantro or basil.  It’s delicious, but I’m sure the pomegranate arils would be even better, because their tartness would provide a nice balance to the richness of the eggplant & labneh.

IMG_5695

This cute towel is from our good friends Debbie & Bill!

What did you buy at your farmers market this week?

Bon appetit!


Leave a comment

Oatmeal Raisin Cookies

What are your thoughts on raisins?  Many people have strong feelings about them and either love or hate them, kind of like nuts and coconut.  As a kid, I wanted to like the Sun-maid Raisins we had in the pantry.  Those little boxes with the rosy-cheeked lass holding a big basket of green grapes were appealing to me, for some reason.  At that time, and for a long time thereafter, I was firmly in the “I do not like raisins camp.”  I wasn’t a fan of grapes either.  They, and the grapes from which they came, were too sweet {Never mind that I could eat chocolate frosting & brownie batter like nobody’s business…that’s a different story!}.  Years later, I discovered organic Red Flame grapes, and I thought they were pretty good, and even enjoyed the raisins produced from them.  They were still too sweet to eat on their own, but I enjoyed them with some nuts {and a bit of dark chocolate}.

Even though I learned to like raisins, I only wanted them in certain dishes.  Raisins were great in Hot Peanut Cereal, bread pudding and as a curry condiment, but definitely not in oatmeal cookies for sure.  Nope, not in my cookies.  Until now.  What’s different now?  I’m not certain, but I think it’s a combination of the ingredients I’m using and baking the cookies long enough for some caramelization to occur.  The coconut sugar, along with some brown sugar lends a caramel flavor, and the proper baking time adds to that flavor, as well as some crispness.  The cookies are delicious anytime {even right out of the freezer}, but are their very best the same day they are made {the same as my chocolate chip cookies}.  Freshly baked and cooled, they are a little chewy in the center, and a little crispy around the edges…cookie perfection.

Plate of oatmeal cookies

Oatmeal Raisin Cookies
adapted from The Best Recipe {Cooks Illustrated}

180 gm whole wheat pastry flour {1 1/2 cups}

1/2 tsp kosher salt

1/2 tsp baking powder

1/4 tsp freshly grated nutmeg

1/8 tsp cinnamon

1/2 pound {2 sticks} unsalted butter, softened

4 3/4 oz. light brown sugar {2/3 cup – 1 tbsp}

1 1/2 oz. granulated white sugar {2 tbsp – 2 tsp}

2 1/2 oz. blonde coconut sugar {1/2 cup + 2 tsp}

2 large eggs

10 1/2 oz. rolled oats-not instant {1 1/2 cups}

5 1/2 oz. raisins {1 1/2 cups}

6 oz. walnuts

Crunchy salt {Maldon or Fleur de Sel} for sprinkling on top before baking {not iodized table salt}

Place oven racks at the 2 center positions & preheat oven to 350 degrees.  Line 2 large cookie sheets with parchment paper.

Whisk together the flour, salt, baking powder, nutmeg & cinnamon in a medium bowl.

Using an electric mixer, beat butter until creamy.  Add sugars & beat until fluffy, about 3 minutes.  Beat in eggs one at a time.

Stir dry ingredients into butter-sugar mixture with a wooden spoon or rubber spatula.  Stir in oats, raisins & walnuts.

Chill dough for at least 15″ and up to 2 days.

Roll dough into 1 1/2 oz. balls {about golf ball size} & place 2 inches apart on lined cookie sheets.  Flatten cookies slightly with a fork, using a criss-cross motion as you would for peanut butter cookies.  You can use your hand or the bottom of a flat drinking glass.  Sprinkle generously with crunchy salt of choice.

Bake cookies for 16-20 minutes, or until they are golden brown around the edges, and the bottoms are dark brown .  Halfway through baking {8 minutes}, turn cookie sheets from back to front, and switch oven racks.

Cookies on plate including bottom

Makes about 30 cookies

Notes:

  • These cookies are best when the bottoms are dark brown, and perhaps even a little glossy.
  • You can freeze shaped cookies to bake later, adding a little extra time if you bake them while frozen.  I usually like to let them thaw out before baking, although you can bake them frozen.

Cookies are really good with lattes!  Latte

Bon appetit!


Leave a comment

Salad for breakfast? Yes, please!

I’m fairly certain that I have endorsed salad and other “non-breakfast foods” elsewhere on my blog.  But if you missed it, here it is again.  I can and will happily eat most anything.

I like to start my day with healthy & delicious food.  Getting a head start on the day’s vegetables isn’t a bad idea either.

Today, I had one of my favorite breakfast salads, including an ingredient I’ve never used on salad.  Actually, I haven’t used a lot of chia seeds, but I am trying to incorporate them into our food more often.  Not sure I can get into the gelatinous texture that chia provides when allowed to sit and gel, but they were great on my salad.

You’ll need a fork and a spoon for this dish-a fork for the salad on top, and a spoon to scrape up the delicious yogurt at the bottom of the bowl.  The yogurt mingles with your dressing, and any other flavors that make their way downward.

You can build a breakfast salad any way you like, including adding an egg on top, which I didn’t do this time, but it is delicious.  This is the salad I created this morning…

Breakfast salad, green tea, ry-vita

Yogurt on the Bottom Breakfast Salad 

Nancy’s Whole Milk Plain Organic Yogurt- a few spoonfuls, no more than 1/4 cup

Salad greens-I used curly green leaf & baby beet greens

Onion- thinly sliced pole to pole {my favorite cut for salad}

Tomatoes- I used cherry tomatoes from my lanai garden

Avocado- as much as you like

Fresh herbs- I used tarragon, dill & cilantro from my lanai garden

Fruit- I used 2 dried plums {a.k.a. prunes}

Freshly ground salt & pepper

Red wine vinegar {or your favorite vinegar}

Extra virgin olive oil

Plop a few spoonfuls of yogurt at the bottom of your bowl-if you put too much, it can overwhelm your salad.

Add greens, onion, tomatoes, avocado & fresh herbs.  Season with freshly ground salt & pepper.  Drizzle red wine vinegar and olive oil over all.  Garnish with a few prunes, admire your creation & enjoy with toast, or a Ry-Vita buttered with organic pasture butter and tea as I did.

Bottom of bowl yogurt breakfast salad

Bon appetit!


Eggplant Tricolore

Leave a comment


“Gleaming skin;  a plump elongated shape;  the eggplant is a vegetable you’d want to caress with your eyes and fingers, even if you didn’t know its luscious flavor.”  by Roger Verge

Although it is a vegetable {actually, it is a fruit, but that’s another discussion} with varied preparations, eggplant parmigiana is the quintessential eggplant dish for many, however it is not one of my favorite ways to enjoy eggplant.  My mom used to sauté eggplant slices until they were golden brown, and I loved eating them with catsup {not a kid thing…I still love catsup & so does my husband}. Sometimes I roast thick slices of eggplant & happily enjoy them dipped into organic catsup.  I prefer Italian Globe eggplants, over the other slender varieties {Thai, Indian, Japanese, etc.}.

Eggplant is one of those foods that, I suspect, prompts strong feelings.  While I have not researched this matter, I think people tend to love or hate eggplant.  The Flavor Bible {have you seen this book yet?} describes eggplant’s taste as “bitter,” a taste which does not have as many fans as sweet, salty, sour, etc.

Many years ago, Erika, a friend & coworker, introduced me to vegetarian food by way of Laurel’s Kitchen, a book from which I prepared & enjoyed many dishes.  In fact, it was my “go to” cookbook for a long time.  I made Laurel’s falafel recipe & had my first taste of Middle Eastern food, which I now consider the cuisine I most want to eat.  Which brings me back to eggplant.  One of my new favorite ways of enjoying eggplant comes from Yotam Ottolenghi’s cookbook Plenty.  It is quick to make, stunning on a platter & super delicious.  Regardless of your feelings toward eggplant, I am of the opinion that you should make this recipe; just try it.  I think Eggplant Tricolore may have the power to turn you into a lover of eggplant.  Perhaps the dressing balances the eggplant’s inherent bitterness, which makes this a dish that goes down easily, like a fine wine.  My husband & I can polish off 2 eggplants in one sitting!

If you make this, snap a photo & send it with a comment on how you liked it.

Eggplant slices ready for roasting

Eggplant Slices Ready for Roasting

Roasted eggplant slices

Roasted Eggplant Slices

Eggplant Tricolore 2

Eggplant Tricolore

Eggplant Tricolore {and more}
adapted from Plenty {Ottolenghi}

2-3 medium eggplants {preferably Italian globe variety}

olive oil

Maldon sea salt & black pepper

1 yellow bell pepper, cut into 3/8” dice

10 cherry tomatoes, quartered

1 tbsp red wine vinegar

3 1/2 tbsp capers, plus 1 tbsp of the caper brine

5 oz. top-quality buffalo mozzarella

1 cup picked coriander {cilantro} leaves

Preheat oven to 375 degrees.  Cut the eggplants widthwise into 3/4-inch-thick slices.  Place the slices on a baking sheet lined with parchment paper or aluminum foil.  Brush them generously on both sides with plenty of olive oil and sprinkle with salt and pepper.  Roast in the oven for 25”-35,” or until the eggplants are soft and golden brown.  Allow to cool down.

Mix together the bell pepper, tomatoes, vinegar, capers, caper brine and 2 tbsp of olive oil.  Set aside for at least 30” {the mix can be kept refrigerated for several days; the flavors will deepen over time}.

To serve, arrange the eggplant slices, slightly overlapping, on a serving dish {a meat platter is the perfect size for 2 medium eggplants}.  Break the cheese up and scatter on top.  Spoon over the dressing and scatter with the cilantro.  Enjoy!

Notes:

  • I always use extra virgin olive oil
  • I always use freshly ground pepper
  • Maldon salt is worth seeking out, but you can substitute another crunchy salt such as Fleur de Sel
  • yellow or orange peppers work best color-wise, but use what you have
  • I have used tomatoes other than cherry tomatoes, with excellent results
  • The eggplant can be roasted up to a day ahead and refrigerated
  • I have always used lebni {Lebanese kefir cheese} instead of mozzarella & it is delicious.  Soft goat cheese would also be delicious!
  • Salting eggplant for 30” or so is supposed to draw out the bitterness, but I usually do not do this.  Possibly this is valuable for older eggplants with large seeds, but ours come from the farmers’ market and are recently picked.
  • You can use fresh basil instead of cilantro if you desire
  • This is great with a glass of red wine!

Eggplant Tricolore 1

Bon appetit!

This gallery contains 5 photos


Leave a comment

Chiles Stuffed with Crusty Beans

Growing up, I remember having stuffed green peppers for dinner fairly frequently.  Stuffed peppers weren’t one of my favorite dinners, because I wasn’t a fan of the stuffing {or meatloaf either}, which was probably just ground beef with onions and seasonings.  Mashed potatoes were always one of the accompaniments, and they were always a hit with me.  Who doesn’t love mashed potatoes?  I remember making a deal with my mom on Stuffed Pepper Nights. . . I gave her my stuffing, and she gave me her green pepper case.  Score!  I love peppers, and green peppers are my favorite, even though red, yellow and orange are supposed to be healthier.  Green peppers rank high on my list of favorite vegetables, in cooked or raw form.  They have a wonderful green flavor that I love.  On a hot day, a refreshing snack is half a cold green pepper sprinkled with sea salt; when you bite into the pepper, cool spray mists your face and it tastes oh so delicious . . .and then you eat the other half!

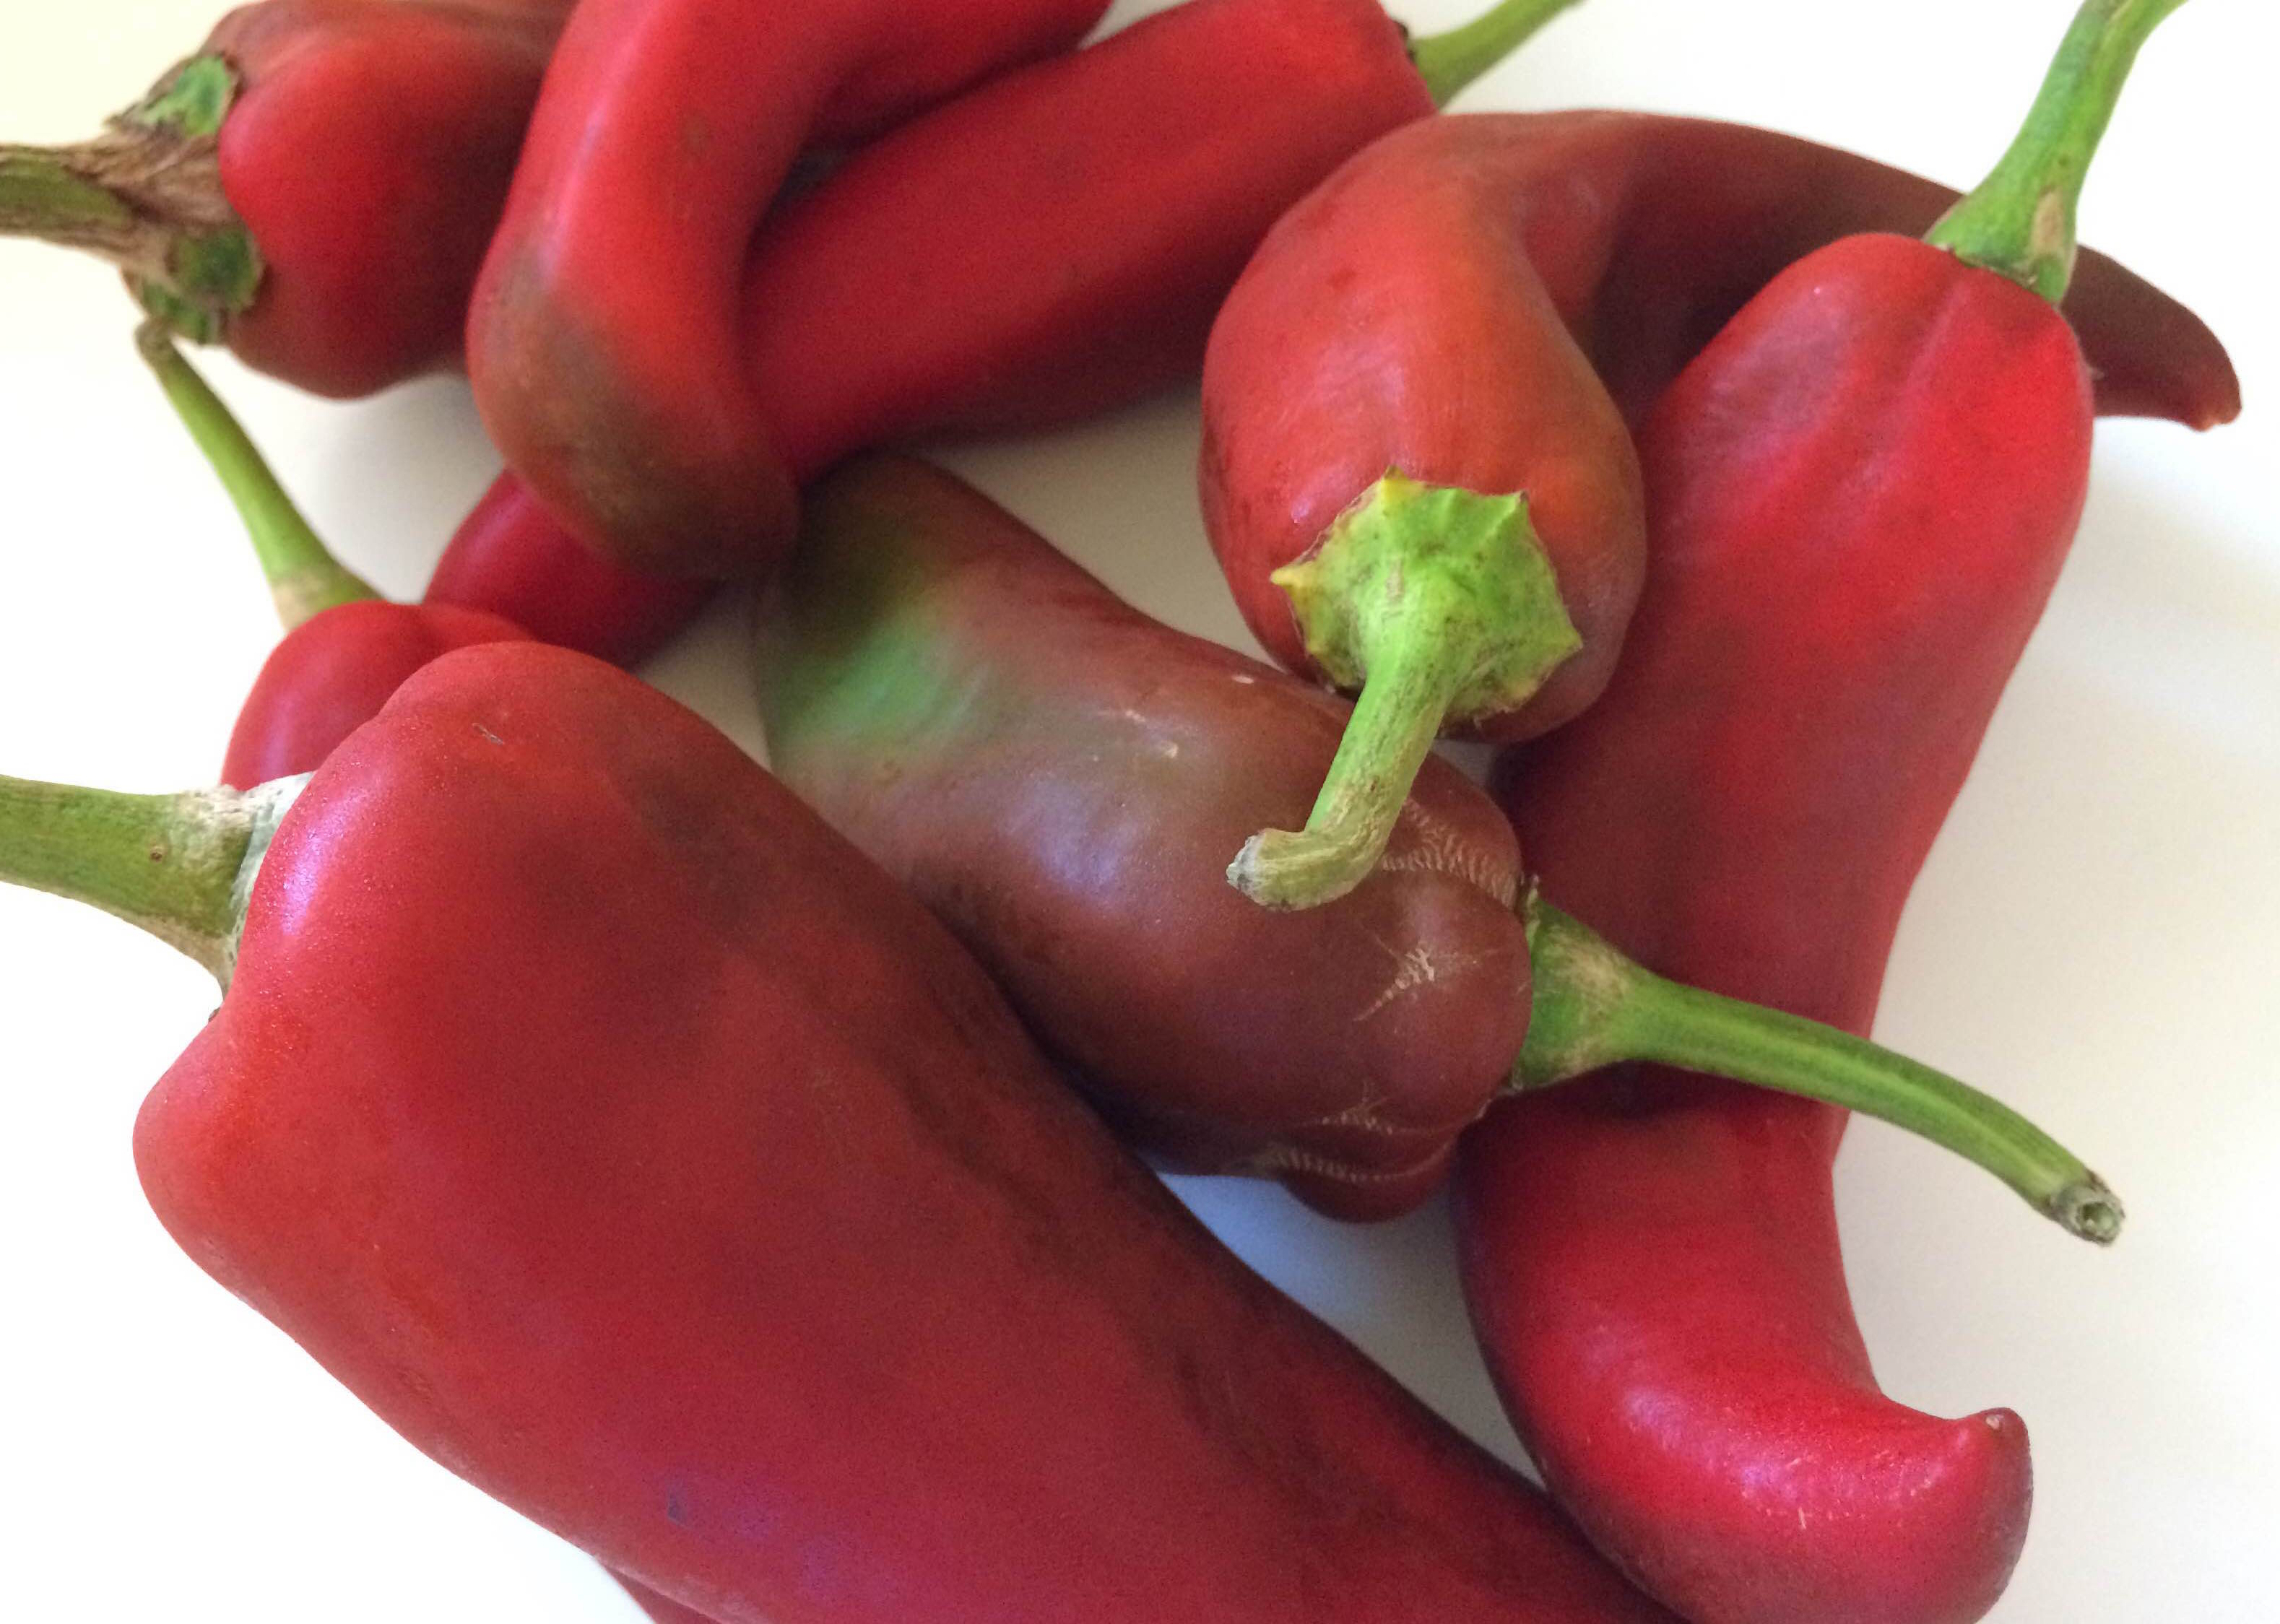
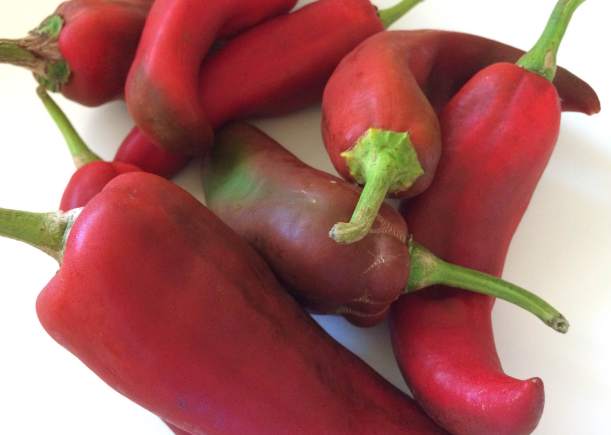
I have been making my own version of stuffed peppers, using chiles from the Upcountry Farmers Market.  I’m not sure of the variety, but they are a sweet pepper, so no worries if you aren’t into a good mouth burn, which I happen to love.  You can use any chiles you like; poblanos are a particular favorite of ours.  The stuffing here is not meat, but what we call Crusty Beans.

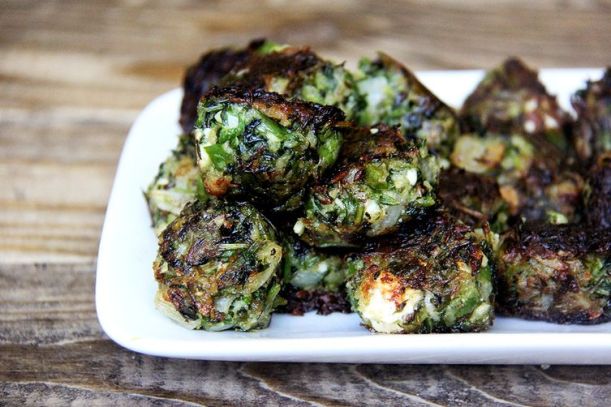
I would describe the texture of kidney and black beans to be moist and creamy.  Once they are cooked up as Crusty Beans, while still moist on the inside, the outside has a bit of crust, from cumin and chili powder; they are delicious.  Even though I prefer cooking dry beans, canned beans make this delicious dish quick and easy to make.  Crusty Beans are great for any meal, and are a fabulous accompaniment for eggs and toast, if you aren’t stuffing them into peppers.

This slideshow requires JavaScript.

Crusty Beans

2 15-oz. can kidney or black beans, rinsed and drained {or about 2 cups cooked and drained beans}

1/2 medium onion, diced about 3/4 cup

5 cloves garlic, minced

Olive oil 4 T

Butter 2 T

Ground cumin 6 t

Chili powder 3 t {click here if you’d like to try my homemade chili powder}

Red pepper flakes 1/2 T or 1 minced jalapeño

Salt

Pepper

Over medium-medium high heat sauté beans, cumin and chili powder for about 5”.  Add onions, garlic & jalapeños.  Season with salt and pepper to taste.  Cook, stirring occasionally, for about 5” more.  The onions will still have a bit of crunch to them, because they were added after the beans were sautéed.

Makes 4-6 generous servings.

Now let’s talk about the peppers.  Select a pepper that you like, that has room for some stuffing.  You will need a lot of Crusty Beans if you decide to stuff them into bell peppers, but poblanos or the sweet peppers shown here take about 2-3 tbsp of filling.

Raw Sweet Peppers

Chiles Stuffed with Crusty Beans

8 chiles {poblanos, sweet long peppers, or other variety}

Sea salt

Crusty Beans

Soft goat cheese {or another good melting cheese that you like}

Minced jalapeño for garnish, if desired

Preheat broiler to high.  Adjust oven rack to second position from the top.  Wash and dry the peppers, and place them on a foil lined baking sheet.  There is no need for oil or seasoning for this step.  Broil peppers, turning when each side gets charred.  You can position peppers right next to each other to prevent them from rolling over, if necessary, so all sides can get charred.  When all sides are charred, remove baking sheet from the oven and fold the peppers up in the foil for about 15”.  The peppers will steam and the skins will loosen up for easy removal.  The peppers will be delicious, but the skins are papery and not pleasant to eat, so you will want to remove them when they are cool.

This slideshow requires JavaScript.

Once the skins have been removed, cut peppers on one side from the pointy end to the stem end {leave the stem end on}; kitchen shears are great for this.  They can be a little slippery, but just take your time.  Remove the seeds and membrane from the peppers; if you carefully snip the stringy white membrane close to the stem, it is more easily removed.  A few seeds won’t hurt, but try to get most of them.  I have heard conflicting opinions on whether the seeds should be removed by running the peppers under water, which certainly makes quick work of this task.  For years, I avoided rinsing the peppers, but the last couple of times I’ve made them, I let the water do most of the work, and the peppers tasted great.

Sprinkle the insides of the peppers with a little sea salt.  Now it’s time to stuff your peppers! The roasted peppers are fragile, so be careful not to tear them while stuffing.  I’m ok with overstuffed peppers; it’s fine if you can’t close the peppers.  Spray an 8×8 baking dish with pan spray. Nestle the unstuffed peppers together in the dish, stuff them and then cover the dish with foil.  Bake at 350 degrees for 20 minutes, then remove the foil and sprinkle liberally with goat cheese.  Bake for another 10 minutes so the cheese is soft.  Shower with minced jalapeño and eat hot.

This slideshow requires JavaScript.

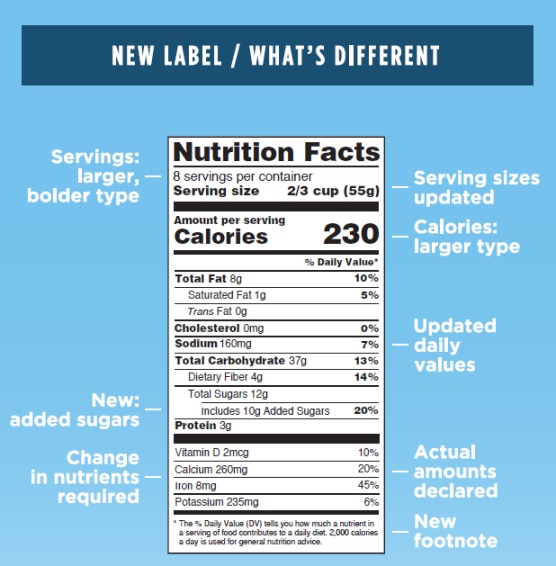
Click here for some info on the health benefits of peppers!

Bon appetit!

salad with mango and vanilla vinaigrette


Leave a comment

A Splash of Vanilla in Your Salad

There are 4 basic tastes that come together to provide us with pleasure {hopefully} in the food we eat:  salty, sweet, bitter and sour.  There is also a savory taste, a fifth taste, known as umami.  Foods rich in umami include mushrooms, tomato paste, anchovies and green tea, among others.  Adding umami rich foods to a dish can elevate it to a new level, even though no one would ever be able to pick out that ingredient {for example, anchovies}.  How many people who love Caesar Salad know that there are anchovies in the dressing?  Many ingredients we add to our recipes are not in-your-face flavors, but are subtle, adding a layer that makes a difference in the final dish.

Desserts aside, I normally would not choose to eat something sweet over something savory.  While I can eat an alarming amount of chocolate frosting or brownie batter, I prefer a flavor profile that includes sour, bitter and salty over sweet. I enjoy a tart salad dressing, and when I make vinaigrettes, I am liberal with the vinegar, not adhering to the usual guideline of 1 part vinegar to 3 parts oil.  But I was thinking about vanilla the other day, and wondering how it would taste in a vinaigrette.  I found a recipe online for Vanilla Vinaigrette and tried it out on a green salad that included mango and avocado.  Consider me hooked on Vanilla Vinaigrette.  It not only has a great alliterative name, but tastes fantastic, adding a slightly sweet and tropical flavor when drizzled over the right salad.  Vanilla Vinaigrette isn’t for just any salad, but it is wonderful on salads that include fruit.  Fruit salads aren’t usually on my radar screen;  I love fruit, and don’t make fruit salads per se, but include fruit on many of our green salads.  What makes Vanilla Vinaigrette work is its subtle sweetness that mingles with the fruit. The fruits that work best with this dressing are tropical fruits and summer fruits, avocado included.  I love avocados, particularly the way they gently break down and become a part of the dressing.Green Salad with Mango & Vanilla Vinaigrette

As you can see in the picture, we added a bit of protein to our salad, in the form of a hard cooked egg.  I saw someone eating a hard cooked egg the other day, and the inside was atrocious, with an ugly gray-green ring around the yolk, so I thought I’d include the directions I use for making eggs with beautiful yellow yolks.

Hard Cooked Eggs
recipe from Vegetarian Cooking for Everyone by Deborah Madison

Put eggs in a single layer in a saucepan with a cover.  Bring them to a gentle boil {uncovered} and boil for 1 minute.  Turn off the heat, cover and let stand for 6 minutes.  If you are going to use them later, put eggs into an ice bath to stop cooking.  Otherwise, peel and enjoy warm with a bit of salt and pepper.

Vanilla Vinaigrette
adapted from Food.com

3 tbsp white wine vinegar {champagne vinegar also good}

1 tsp pure vanilla extract

1 tsp sugar {original recipe called for 1 tbsp}- add more or less to suit your taste

1/2 tsp sea salt

1/4 tsp freshly ground black pepper

Whisk all ingredients together until well blended.

Notes:

  • I have always used romaine with this dressing, but a Manoa, Bibb or Butter lettuce would be fantastic.
  • Mangoes, lilikoi {passion fruit}, blueberries, stone fruit and avocado are all delicious!
  • Some herbs that work well are basil, mint, tarragon and cilantro.
  • Sweet onions are always a nice touch, and pretty as well.
  • Chopped macadamia nuts that have been lightly toasted in coconut oil & salted make a delicious crunchy topping!

Bon appetit!